Your Cart

No products in the cart.

SARJAPURA, BENGALURU

Quick Enquiry
loader

GET TO KNOW US

ABOUT MEGHALITE

Driven by the desire to achieve new heights

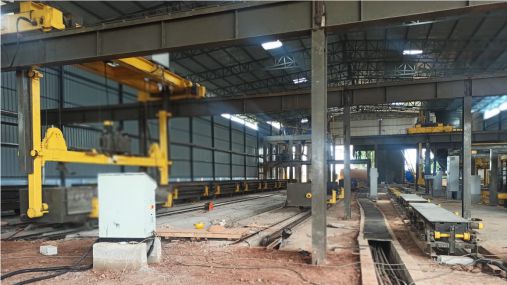
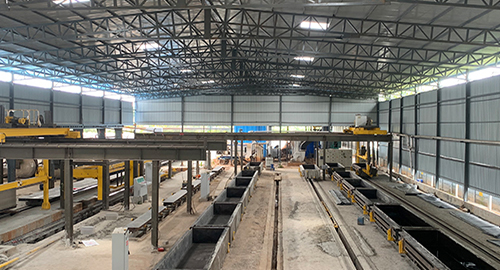
The desire to achieve new heights in products/solutions constantly drives us humans to explore deeper and thrive further. It is this search for creating better building technologies and/or materials that has resulted in the introduction of AAC (Autoclave Aerated Concrete). Realising its potential, the ever-evolving construction industry has embraced AAC (Autoclave Aerated Concrete) cutting-edge technology as it stands out from the age-old methods of using conventional blocks.

Realising that this product holds high future potential and can help in enhancing the efficiency of the construction process, Meghalite's team started improving on the foundations laid by years of previous architectural discoveries. As a worthy contender for the modern building material crown today, Meghalite AAC Block comes loaded with a generation of new properties and smart features such as lite weight, strong, thermal & sound insulation, pest resistant and other core benefits which ease the process of construction.

organic-news-21
loader

Welcome to Meghalite

A company known for creating solutions that are light and alright

slideimg1.jpg
organic-news-21-e1614194408403.jpg

Modern Meghalite

Meghalite AAC blocks are ideal for industrial, commercial and residential structures for different applications. So select the most promising building material and keep a competitive edge, use Meghalite AAC block.

A vision of a sturdy future through strong Meghalite

Why Meghalite AAC Blocks are Eco-friendly & Energy Saving

It's because Meghalite AAC Blocks:

  • Make productive use of recycled industrial waste – such as fly ash (which is a by-product from thermal power plant)
  • Apply non-polluting manufacturing process
  • Use non-toxic ingredients (non toxic chemicals)
  • Do not emit gases even when they are exposed to fire (like Carbon dioxide, Carbon monoxide and so on)
  • Feature low thermal conductivity (hence, more energy efficiency)

Mission

Meghalite is focused on building its business by leveraging on the trust earned by delivering high quality products and services to its customers.

Vision

To be an innovative company where high-quality, low cost building materials make people’s lives better.

Our Quality Policy

The primary goal of Meghalite as a company is total customer satisfaction, and to achieve that its every team member values quality as the foremost priority. Each of its products are made while applying the best industry standard, with emphasis on excellence. The dedicated workforce, headed by experienced management team, is committed to delivering superlative products.

General Instructions

Wall Installation-1st Level Coursing

  • Place a full width 1/2" deep sand-coment mortar joint using a masonry trowel. Mortar composition can either be 1:6 or 1.5 Portland Cement: Sand or any approved thin bed mortar
  • Set the first corner block in the sand-cement mortar • Increase or decrease the height of the block by tapping on the block with a rubber mallet or by adding additional mortar under the block

Start the Leveling Bed

Set the first corner block

Set the Second corner block

Repeat For Additional Corner

Wall Installation - Normal Course

  • Clean the bed joint surface with a brush ensuring there's no dust or any other particles so that the adhesion with mortar is optimum.
  • Now apply mortar to head and bed joints using a clean, notched trowel. Ensure that the mortar covers the full width of the joints.
  • Carefully ensure each block is close to the head joint.
  • Finally tap the end of the blocks with a rubber mallet ensuring full surface coverage of the thin bed mortar.
  • Repeat the above steps till the wall is complete.

Clean Bed Join Surface

Set block

Tap End Of Block

Chasing For Conduit

Install Conduit

Install Electric Boxes

Making Conduits in Wall

  • For the purpose of making conduits for electricity and piping make a chase with chasing tools or an electric router.
  • Do not drill beyond 1/3rd of the depth of the wall.
  • After drilling conduits use mortar (1:6-cement sand) to fill the notch.
  • Then install the necessary cables and fasten with clips if necessary.

Plastering

  • Before plastering, cement slurry may be applied on the walls and only leaner mix shall be applied.
  • The thickness must be 10-12 mm of 2 layers on the exterior walls and on the internal wall it should be 1 layer of 10-12 mm.
  • Before plastering, the wall should be watered adequately.
  • After watering, plastering should be done by applying rendering material. Chicken mesh should be used during plastering the wall. Chicken mesh is a must while plastering along the beam/column (concrete)-block joints.
  • Only well-sieved sand should be used for plastering
  • Once done, the plastered wall should be watered for 7 days.

My wishlist

Product name Unit price Stock status
No products added to the wishlist
×